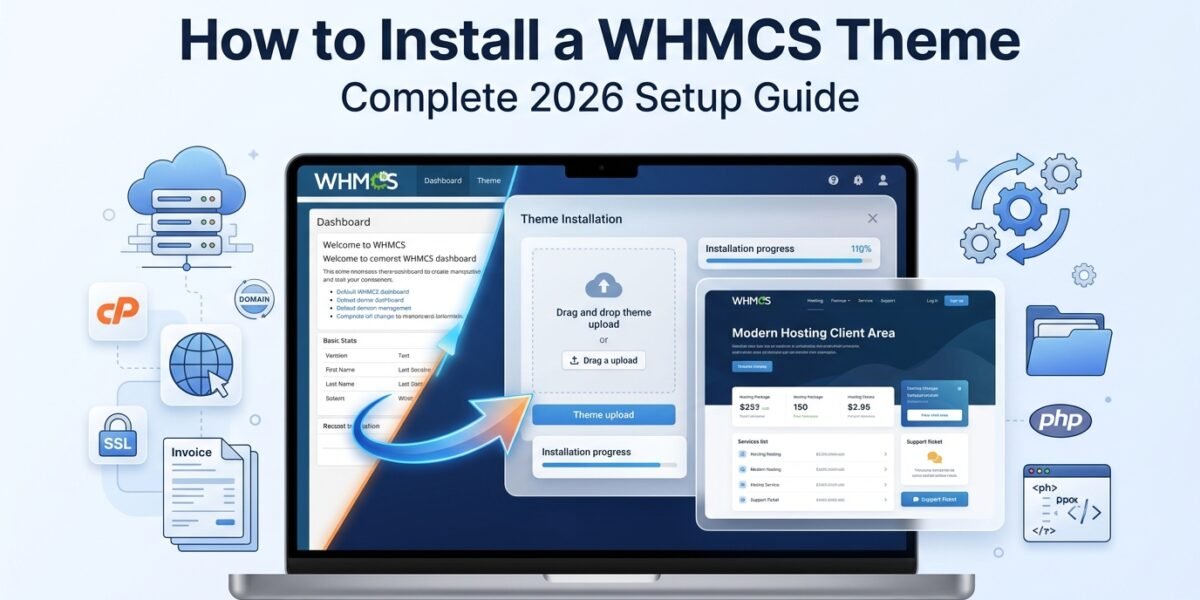
If you've just bought a shiny new template and you're wondering how to install a WHMCS theme without breaking your live billing site, you're in the right place. Whether you're switching from the default Twenty-One theme to something like Lagom, Hostim, or a Zomex template, the process only takes about 15 minutes — if you know exactly which folders go where. I've installed dozens of these over the last four years, and every single failure I've seen came down to one of five tiny mistakes. This guide walks you through the whole thing, then shows you how to avoid every one of them.
/templates/ on your server via FTP or cPanel File Manager, upload any bundled addons to /modules/addons/, then log into WHMCS admin → System Settings → General Settings → General tab and pick your new theme from the Template dropdown. Save, empty the template cache, and you're live.
📖 What's in this guide
- What a WHMCS theme actually is
- Before you start: prerequisites
- The 8-step installation walkthrough
- Video: watch it done live
- Post-install configuration
- Troubleshooting the 5 most common errors
- Free vs premium themes compared
- Best practices & version-safe updates
- FAQs
What Is a WHMCS Theme (and Why It Matters)
In WHMCS, a theme — sometimes called a “system theme” or “client area template” — controls what your customers see when they log in, order, or open a support ticket. It's separate from your marketing website (that's usually WordPress) and separate from the order form template, which only styles the checkout flow.
According to the official WHMCS documentation, a theme lives inside the /templates/ directory of your self-hosted installation, and you can switch between them from the admin area without touching a single line of code. That's the good news. The tricky part is getting the files into the right place first — which is what this article is entirely about.
If you're brand-new to the platform and haven't yet installed the software itself, start with our WHMCS setup guide and then come back here. Already up and running? Keep reading.
Prerequisites: What You Need Before Installing
Grab these five things before you open a single file. Skipping any of them is where 80% of “the theme won't show up” support tickets originate.
| Requirement | Why you need it | Where to get it |
|---|---|---|
| WHMCS admin access | To activate the theme and clear the cache | Your existing admin URL |
| FTP or File Manager access | To upload theme files to the server | FileZilla, WinSCP, or cPanel |
| The theme ZIP archive | Contains the template folder and any modules | Marketplace or theme developer |
| WHMCS version match | A theme built for v8.9 will break on v7.x | Check Utilities → System → PHP Info |
| A full backup | Your safety net if anything breaks | See our WHMCS backup & restore guide |
How to Install a WHMCS Theme in 8 Steps
These are the exact steps I follow on every install. Do them in order — the sequence matters because addon modules must be present before the theme's templates try to call their hooks.
Extract the Theme Archive
Unzip the downloaded .zip on your computer. You'll usually see a folder structure like this:
your-theme-name.zip
├── templates/
│   └── your-theme-name/
├── modules/
│   └── addons/            (optional)
├── lang/
│   └── overrides/         (optional)
└── documentation.pdf
Do not upload the ZIP directly — WHMCS won't read it. Extract first, upload folders second.
Connect to Your Server
Fire up FileZilla (or your cPanel File Manager) and log into the server that hosts your WHMCS install. Navigate to the WHMCS root directory — this is the folder that contains configuration.php, init.php, and directories like /admin/, /templates/, and /modules/.
public_html/ or a subfolder like public_html/billing/. That's where 90% of installs live.Upload Addon Modules (If Included)
If your theme ships with an addons/ folder, upload its contents into /modules/addons/ on the server. Premium themes like Lagom, Hostim, and DesignArc all use this pattern to power their theme-editor GUIs.
Skip this step and you'll get a blank white page or a Smarty template error the moment you activate the theme — the templates are looking for a hook that doesn't exist yet.
Upload the Theme Folder
Drag the entire your-theme-name/ folder into /templates/ on the server. So your final path should look like:
/public_html/templates/your-theme-name/If the theme also includes custom order forms, upload those into /templates/orderforms/. Wait for the transfer to finish 100% before moving on — half-uploaded template files are another top-5 cause of blank pages.
Add Language Overrides (If Provided)
Some themes ship custom text strings inside a lang/overrides/ folder. Upload these to /lang/overrides/ in your WHMCS root.
Already have overrides there? Don't overwrite blindly — open both files in a text editor and manually merge the new variables into your existing file so you don't lose earlier customizations.
Activate Addon Modules in WHMCS
Log into WHMCS admin and go to System Settings → Addon Modules. Find the module that ships with your theme, click Activate, configure any API credentials or license keys, and set which admin roles can access it. Save.
Set the New Theme as Default
Head to System Settings → General Settings → General tab. Scroll to the Template dropdown. Your new theme should appear in the list — pick it and hit Save Changes at the bottom of the page.
Clear the Template Cache
WHMCS caches compiled Smarty templates in /templates_c/. If you don't flush it, you'll see a Frankenstein mix of old and new. Two ways to clear:
- From admin: Utilities → System → System Cleanup → Empty Templates Cache.
- Manually: delete every file inside
/templates_c/via FTP (keep the folder itself, chmod 777).
Open your client area in an incognito window. The new theme should load, cleanly styled.
🚀 Need a rock-solid WHMCS license before installing a theme?
Get official WHMCS licensing with dedicated support — the foundation your new theme deserves.
Get WHMCS Now →Watch It Done Live: Video Walkthrough
If you'd rather see the whole process on screen, this 2026 tutorial by Zille Hosting walks through installing the Lagom theme from unzip to activation. The steps map 1:1 to the ones above, regardless of which theme you're using.
For a shorter overview using the Hostim theme, this one runs under three minutes:
Post-Install: Configure Your Theme Properly
The theme is live, but the default settings are almost never what you want in production. Do these four things before you send any customer traffic through it:
1. Upload your logo and favicon
Go to General Settings → General tab and upload your logo. Most modern themes also expose a favicon field inside their own settings panel. Recommended logo size: 240 × 60 px, PNG with transparency.
2. Set brand colors
Premium themes like Lagom or Hostim include a visual editor under Addons → [Theme Name] → Theme Settings. Change primary and secondary colors here — never edit the theme's CSS files directly, or your next update will overwrite your work.
3. Verify email templates render correctly
Themes can override email HTML wrappers. Send yourself a test invoice and welcome email. If the branding looks off, check System Settings → Email Templates. Bad email rendering is one of the most-missed post-install checks — full playbook in our WHMCS email deliverability guide.
4. Test the full customer journey
Open a private browser tab. Register a fake account. Order a product. Pay with a test gateway. Open a ticket. Cancel the order. This 5-minute walk-through catches every visual glitch before a real customer does.
Troubleshooting: The 5 Most Common Errors
Every one of the errors below is caused by a specific misstep in the eight-step process. Match the symptom, apply the fix.
| Symptom | Likely Cause | Fix |
|---|---|---|
| New theme doesn't appear in the Template dropdown | Folder in wrong location or misnamed | Confirm it sits directly inside /templates/, not nested. Folder names are case-sensitive. |
| Layout loads but styling is broken | Template cache is stale | Empty /templates_c/ and hard-refresh (Ctrl+Shift+R). |
| Blank white page or PHP error | PHP version mismatch, or missing addon module | Enable WHMCS display errors, check server PHP version matches theme requirements, activate the addon. |
| Missing button labels or garbled text | Language overrides not uploaded | Re-check /lang/overrides/ — every variable the theme calls must be defined. |
| Mobile view looks broken | Theme version doesn't match your WHMCS version | Download the correct version from the developer's dashboard or ask for a compatible build. |
Free vs Premium WHMCS Themes: What's the Difference?
WHMCS ships with a solid default theme called “Twenty-One” — good enough to launch, plain enough that customers know it's default. Here's how the tiers compare in real life:
| Feature | Default (Twenty-One) | Free Third-Party | Premium ($49–$149) |
|---|---|---|---|
| Client area design | Clean, generic | Varies wildly | Polished, branded |
| Order form styles | 2–3 options | Same as default | 5–10 custom flows |
| Theme editor GUI | ❌ | Rarely | ✅ (Lagom, Hostim, DesignArc) |
| Mobile responsiveness | ✅ Basic | Sometimes | ✅ Optimized |
| Update support | Bundled with WHMCS | Abandoned often | 12 months included |
| Speed / Core Web Vitals | OK | Unpredictable | Tuned |
My honest take after 40+ installs: if you're serious about conversion, spend the $69 on a premium theme. If you're just testing an MVP, the default is fine — you can always upgrade later using this same guide.
Pros and Cons of Switching WHMCS Themes
✅ Why installing a new theme is worth it
- Instantly modernizes your client area
- Boosts perceived trust and conversion
- Adds features like dark mode, dashboards, drag-and-drop editors
- Mobile-first layouts out of the box
- Better order-form flows = higher AOV
⚠️ What can go wrong
- Version mismatches trigger blank pages
- Custom hooks may need re-registration
- Third-party modules can break existing integrations
- Untested premium themes still need staging first
- Direct CSS edits get wiped on updates
Best Practices for Long-Term Theme Health
- Never edit theme files directly. Create a child theme by copying the folder and renaming it. That way updates from the developer won't nuke your customizations.
- Version-pin your WHMCS core. Don't auto-upgrade WHMCS the moment a new release drops — check theme compatibility first. See our post on common WHMCS mistakes to avoid.
- Test in staging. Every serious deployment I've seen uses a staging clone. If you skip it, budget for downtime.
- Document your changes. Keep a simple text file listing every custom edit — future-you will thank you.
- Update quarterly. Security patches for premium themes ship every few months. Schedule the update, don't wait for a breach.
Where This Guide Fits in Your WHMCS Journey
Installing a theme is one piece of a larger setup. If you're building your billing stack from scratch, here's the natural order — each link goes to a dedicated deep-dive:
- Decide the platform → What is WHMCS? and our full WHMCS review
- Pick a plan → WHMCS pricing breakdown and license types explained
- Install the software → WHMCS setup guide
- Install your theme → you are here
- Configure the essentials → Cron job setup, payment gateways, multi-currency billing
- Harden and scale → security guide, fraud protection, must-have modules
What Real Users Say
Overall Rating for the Standard Install Process
Frequently Asked Questions
Do I need to reinstall the theme after every WHMCS update?
No. Themes persist across WHMCS core updates. But you should check the theme developer's changelog after every major WHMCS release (v8.x → v9.x) — occasionally a theme needs a patched version to stay compatible.
Can I install two themes and switch between them?
Yes. WHMCS supports unlimited installed themes. Only one can be active as the default, but you can preview others by appending ?systpl=your-theme-name to any client-area URL.
What's the difference between a theme and an order form template?
A theme styles the entire client area (login, dashboard, tickets, invoices). An order form template only styles the checkout flow. Many premium themes ship both.
Can I white-label a WHMCS theme for reseller clients?
Absolutely — that's one of the most common use cases. See our step-by-step on white-labeling the WHMCS client area for reseller hosting.
What if I don't have FTP access?
Use your hosting control panel's File Manager (cPanel, Plesk, DirectAdmin all include one). Upload the ZIP directly to /templates/, extract it in place, delete the ZIP.
Do I need PHP or coding knowledge to install a theme?
No. Installation is a file-upload and dropdown-selection task. Coding knowledge only comes in if you want to customize the Smarty templates or add custom hooks later.
The Bottom Line
Installing a WHMCS theme is genuinely one of the friendlier tasks in the whole WHMCS ecosystem — no CLI, no database edits, no server restarts. Extract, upload, activate, clear cache. Eight steps, fifteen minutes, done. The only reason people struggle is skipping the backup, uploading to the wrong folder, or forgetting the addon module.
Follow the walkthrough above in order, keep a staging environment handy, and you'll never have a “blank white page” story of your own. And if you're still shopping for your WHMCS license or looking to run your entire billing stack on a foundation that supports every popular theme out there, grab an official license below.
🎯 Ready to power your hosting business with WHMCS?
Get your official WHMCS license today — the industry-standard billing platform trusted by 50,000+ hosts worldwide.
Get WHMCS Licensing →Have questions about your specific theme install? Drop them in the comments and I'll reply personally. And if you found this guide useful, share it with a fellow host — every installer I train saves another live site from downtime.