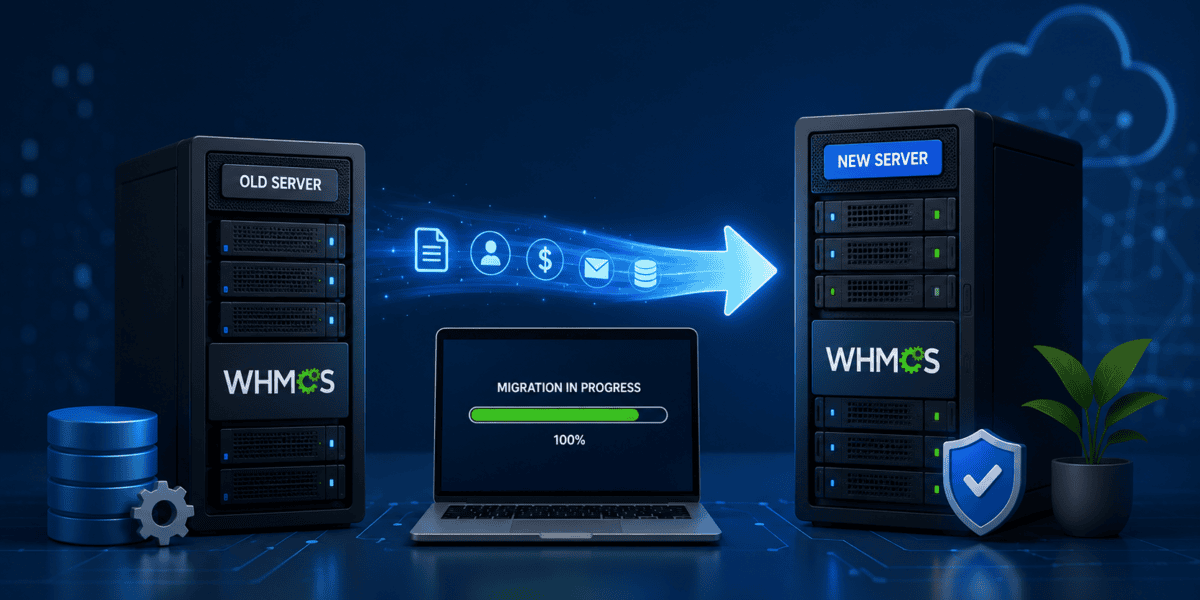
Moving your WHMCS installation to a new server sounds terrifying. One wrong move and you could lose critical customer data, disrupt automated billing, or take your entire hosting business offline. I know that anxiety because I've been there—watching the progress bar during my first database export, wondering if I'd just destroyed my entire business.
Here's the truth: migrating WHMCS doesn't have to be stressful. With the right preparation and a proven methodology, you can move your entire installation to a new server with zero downtime and zero data loss. I've successfully migrated WHMCS installations handling thousands of clients, and I've never lost a single customer record or missed a single automated invoice.
In this comprehensive guide, I'll walk you through the exact process I use to migrate WHMCS installations safely and efficiently. Whether you're moving to a more powerful server, switching hosting providers, or consolidating multiple installations, this guide has you covered.
🎯 What You'll Learn in This Guide
- Pre-migration preparation and risk assessment checklist
- Step-by-step migration process with zero downtime
- Database migration best practices for WHMCS
- File transfer optimization techniques
- DNS and SSL/TLS certificate management
- Post-migration testing and validation procedures
- Troubleshooting common migration issues
- License reissue and activation process
Why Migrate WHMCS to a New Server?
Before we dive into the technical process, let's understand when and why you should consider migrating your WHMCS installation. Not every situation requires a full server migration—sometimes optimization or configuration changes can solve your problems.
Common Reasons for WHMCS Migration
Based on my experience working with hosting businesses, here are the most common scenarios that justify a WHMCS migration:
- Performance Issues: Your current server can't handle increased traffic and transaction volumes. Page load times exceed 3 seconds, and customers complain about slow checkout experiences.
- Hosting Provider Changes: You're switching to a provider with better infrastructure, support, or pricing. Many businesses migrate to premium reseller hosting providers for improved reliability.
- Hardware Upgrades: Moving from shared hosting to VPS or dedicated servers to accommodate business growth.
- Geographic Optimization: Relocating servers closer to your primary customer base to reduce latency and improve user experience.
- Security Requirements: Moving to infrastructure with enhanced security features, compliance certifications, or better DDoS protection.
- Cost Optimization: Consolidating multiple WHMCS installations or moving to more cost-effective infrastructure.
- Disaster Recovery: Emergency migration due to server failures, data center issues, or hosting provider problems.
⚠️ When NOT to Migrate
Don't migrate if you're experiencing simple performance issues that can be resolved through optimization, caching, or configuration changes. Always try these less risky solutions first. For guidance on optimizing your current installation, check out the WHMCS security and optimization guide.
Pre-Migration Preparation: The Foundation of Success
The most critical phase of any WHMCS migration happens before you touch a single file. Proper preparation prevents 90% of migration problems. Here's my proven pre-migration checklist that I use for every migration project.
1. System Audit and Requirements Assessment
First, document your current WHMCS environment completely. This information is critical for planning your new server configuration.
| Component | Minimum Requirement | Recommended for Production |
|---|---|---|
| WHMCS Version | 9.0+ | Latest stable (9.1+) |
| PHP Version | 8.1 | 8.2 or 8.3 |
| MySQL/MariaDB | 5.7+ / 10.3+ | 8.0+ / 10.6+ |
| Disk Space | Current usage + 50% | Current usage × 3 |
| RAM | 2GB | 4GB-8GB |
| CPU | 2 cores | 4+ cores |
2. Create Comprehensive Backups
Never start a migration without multiple backup copies. I follow the 3-2-1 backup rule: 3 copies of data, on 2 different media types, with 1 copy offsite.
💡 Pro Tip: Test Your Backups
Always verify that your backups are complete and can be restored. I once worked with a company that discovered their backup corruption during an emergency migration—a nightmare scenario that cost them 48 hours of downtime. Extract a test file and verify database integrity before proceeding.
3. Set Up a Staging Environment
Testing your migration in a staging environment catches problems before they affect customers. This step alone has saved me countless hours of troubleshooting.
For detailed instructions on creating a proper staging environment, see my guide on setting up a WHMCS staging environment. This allows you to perform a complete test migration, identify issues, and refine your process before touching production.
4. Prepare the New Server Environment
Your new server must match or exceed your current environment specifications. Here's my standard server preparation checklist:
Step 1: Install Required Software Stack
- Install Apache/Nginx web server with proper configurations
- Install PHP with all required extensions (ionCube, Zend, etc.)
- Install MySQL/MariaDB and optimize for WHMCS workloads
- Install SSL certificates (Let's Encrypt or commercial)
Step 2: Configure Server Security
- Set up firewall rules (UFW, CSF, or similar)
- Configure mod_security or similar web application firewall
- Set proper file permissions (755 for directories, 644 for files)
- Enable automatic security updates
Step 3: Optimize Performance Settings
- Configure PHP-FPM or FastCGI for better performance
- Set up MySQL query cache and connection pooling
- Configure server-level caching (Redis or Memcached)
- Optimize Apache/Nginx worker processes
5. Plan Your Migration Timeline
Timing is everything in server migrations. Choose a maintenance window during your lowest traffic period. For most hosting businesses, this means late night or early morning hours on weekdays.
| Migration Method | Estimated Downtime | Technical Difficulty | Best For |
|---|---|---|---|
| DNS-Based Migration | 0-5 minutes | Medium | Most scenarios |
| IP Swap Migration | 0 minutes | Advanced | Same hosting provider |
| Maintenance Mode Migration | 1-4 hours | Low | Low-traffic sites |
| Parallel Running Migration | 0 minutes | Advanced | High-traffic operations |
The Zero-Downtime Migration Process: Step-by-Step
Now let's get into the actual migration process. I'll walk you through my proven method for migrating WHMCS with minimal or zero downtime. This process assumes you're using the DNS-based migration method, which works for 95% of scenarios.
Phase 1: Prepare and Transfer Files
1 Export WHMCS Files from Old Server
Start by creating a complete copy of your WHMCS directory. This includes all core files, modules, themes, and uploads.
🚀 Speed Optimization Tip
For large WHMCS installations (>5GB), use rsync instead of traditional file transfer methods. Rsync transfers only changed files and can resume interrupted transfers, making it much more reliable for large migrations.
2 Transfer Files to New Server
Use one of these methods to transfer files to your new server:
3 Extract Files on New Server
Phase 2: Database Migration
The database migration is the most critical part of the process. Any corruption here means lost customer data, invoices, or transactions.
4 Export Database from Old Server
⚠️ Critical Database Export Settings
Always use the --opt flag when exporting WHMCS databases. This includes crucial options like --lock-tables and --quick that prevent data inconsistencies. I once debugged a migration for 3 hours before discovering the client used a standard export without these flags, causing subtle invoice calculation errors.
5 Create Database on New Server
6 Import Database to New Server
✅ Database Import Verification
After importing, always verify critical tables exist and contain data. Check these essential tables: tblclients, tblinvoices, tblorders, tblhosting, and tbladmins. Run a quick SELECT COUNT(*) on each to confirm data integrity.
Phase 3: Configuration Updates
7 Update Configuration.php
The configuration file contains database credentials and encryption keys. Update it to reflect your new server settings.
⚠️ DO NOT Change Encryption Hash
The $cc_encryption_hash value in configuration.php must remain identical to your old server. Changing this will make all stored credit card data unreadable and break payment processing. This is one of the most common—and most destructive—migration mistakes.
8 Update System URL
WHMCS stores its primary URL in the database. Update this to match your new server domain.
9 Configure Cron Jobs
WHMCS requires several cron jobs for automated tasks like invoice generation, domain synchronization, and email processing.
💡 Cron Job Best Practices
For detailed guidance on configuring and troubleshooting WHMCS cron jobs, including PHP version mismatches and execution issues, check out the guide on fixing WHMCS cron PHP version mismatches.
Phase 4: License Reissue
10 Reissue WHMCS License
Your WHMCS license is tied to your domain, IP address, and directory path. You must reissue the license for your new server.
License Reissue Process
- Login to the WHMCS Client Area
- Navigate to Services > Licenses & Services
- Click on your active WHMCS license
- Click the “Reissue License” button
- Update the domain, IP address, and directory path
- Submit and wait for the new license file
- Upload the new license.php file to your WHMCS directory
📋 License Reissue Information Needed
- Domain: Your new server's primary domain (e.g., billing.yourcompany.com)
- IP Address: The new server's public IP address
- Directory: Full path to WHMCS installation (e.g., /home/user/public_html/whmcs)
Phase 5: DNS and SSL Configuration
11 Configure SSL Certificates
Before switching DNS, ensure SSL is properly configured on your new server. This prevents security warnings when customers access your site.
12 Update DNS Records
This is where your migration goes live. Update DNS to point to your new server.
| Record Type | Name | Value | TTL |
|---|---|---|---|
| A Record | @ | [New Server IP] | 300 (5 min) |
| A Record | www | [New Server IP] | 300 (5 min) |
| CNAME Record | billing | yourdomain.com | 300 (5 min) |
🎯 Pro Tip: Lower TTL Before Migration
24-48 hours before your migration, lower the DNS TTL (Time To Live) for your domain to 300 seconds (5 minutes). This ensures DNS changes propagate quickly when you switch to the new server. After migration is complete, increase TTL back to 3600 or higher to reduce DNS query load.
13 Test New Server Before DNS Switch
Before updating DNS, test that everything works on the new server using the hosts file method or accessing via IP.
With this hosts file entry, your computer will access the new server while everyone else still sees the old server. Test thoroughly before switching DNS.
Post-Migration Testing and Validation
After DNS propagates (usually 5-30 minutes with low TTL), perform comprehensive testing to ensure everything works correctly. This checklist has saved me from several post-migration disasters.
Performance Validation
Compare performance metrics between old and new servers to ensure the migration achieved your goals.
| Metric | How to Test | Target Improvement |
|---|---|---|
| Page Load Time | GTmetrix, Pingdom | 20-50% faster |
| Database Query Speed | WHMCS System Health | < 50ms average |
| API Response Time | Test API calls | < 200ms |
| Checkout Completion | Full order test | < 3 seconds |
Common Migration Issues and Solutions
Even with perfect preparation, migrations sometimes encounter issues. Here are the most common problems I've seen and how to solve them quickly.
Issue 1: Database Connection Errors
Symptom: “Unable to connect to database” error after migration.
Solution:
Issue 2: License Invalid After Migration
Symptom: “License Invalid” message in WHMCS admin.
Solution:
- Verify you uploaded the reissued license.php file to the correct directory
- Check that the license.php file has correct permissions (644)
- Confirm the domain, IP, and directory match what you entered when reissuing
- Clear browser cache and WHMCS cache (Setup > General Settings > Clear Cache)
- Contact WHMCS support if issues persist
Issue 3: Emails Not Sending
Symptom: Customers not receiving invoices, tickets, or notifications.
Solution:
Issue 4: Cron Jobs Not Executing
Symptom: Invoices not generating, domains not syncing, no automated tasks running.
Solution:
- Verify cron jobs are properly configured in crontab
- Check PHP version in cron matches WHMCS requirements
- Review the WHMCS cron PHP version mismatch guide
- Verify file paths are correct for new server
- Check cron logs:
/var/log/cronor WHMCS Activity Log - Ensure cron.php file has execute permissions
Issue 5: SSL/HTTPS Errors
Symptom: Mixed content warnings, SSL certificate errors, or HTTPS not working.
Solution:
- Verify SSL certificate is properly installed and valid
- Update System URL to use https:// in database and configuration
- Check .htaccess for proper HTTPS redirect rules
- Clear browser cache and test in incognito mode
- Use SSL Labs test to identify SSL configuration issues
- Ensure all internal links use HTTPS or relative URLs
Advanced Migration Strategies
Zero-Downtime Migration with Parallel Running
For high-traffic WHMCS installations where even 5 minutes of downtime is unacceptable, use the parallel running method. This advanced technique keeps both servers operational during migration.
Phase 1: Set Up Database Replication
Configure MySQL master-slave replication from old server to new server. All database changes sync in real-time, ensuring both servers have identical data.
Phase 2: Sync Files Continuously
Use rsync with a cron job to sync file changes every 5 minutes. This keeps uploaded files and attachments synchronized between servers.
Phase 3: Gradual DNS Cutover
Use weighted DNS records to gradually shift traffic (10%, 25%, 50%, 100%) to the new server while monitoring for issues.
Phase 4: Break Replication
Once 100% of traffic is on the new server and everything works perfectly, disable replication and decommission the old server.
⚠️ Advanced Method Disclaimer
The parallel running method requires advanced MySQL and Linux administration skills. Misconfigured replication can lead to data corruption or inconsistencies. Only attempt this method if you have experience with database replication or can hire a qualified consultant.
Post-Migration Optimization
After your migration is complete and stable, take time to optimize your new environment for peak performance. Here are my recommended optimization steps.
1. Implement Advanced Caching
- OPcache: Enable PHP OPcache to cache compiled PHP bytecode
- Redis/Memcached: Implement object caching for database query results
- CDN Integration: Use CloudFlare or similar CDN for static asset delivery
- Browser Caching: Configure long cache times for CSS, JS, and images
2. Harden Security
A migration is the perfect time to implement security best practices. Follow the comprehensive WHMCS security hardening guide to protect your installation from 2026-era threats.
3. Monitor Performance
Set up monitoring to catch issues before they affect customers:
- Uptime Monitoring: Use services like Pingdom or UptimeRobot
- Performance Monitoring: Track page load times and database queries
- Error Log Monitoring: Set up alerts for PHP/MySQL errors
- Resource Monitoring: Track CPU, RAM, and disk usage trends
When to Consider Professional Migration Services
While this guide enables you to perform a DIY migration, some situations benefit from professional assistance. Consider hiring experts if:
- Your WHMCS installation has heavy customizations or custom-built modules
- You're migrating a high-traffic installation (>10,000 clients)
- You need guaranteed zero downtime for mission-critical operations
- Your database is extremely large (>50GB)
- You lack experience with Linux server administration
- The migration involves complex multi-server setups or load balancers
- You need to migrate during business hours with no maintenance window
WHMCS offers professional migration services that include full data transfer, configuration, and validation. For complex migrations, this investment provides peace of mind and reduces risk.
Migration Checklist: Complete Step-by-Step Guide
Use this comprehensive checklist to track your migration progress. Print it out or keep it open in a second browser window while you work.
Pre-Migration Preparation
Migration Execution
Post-Migration Validation
Alternative Migration Methods
While manual migration provides maximum control, WHMCS offers several alternative migration tools that may suit your needs better.
WHMCS ImportAssist Module
The official ImportAssist addon simplifies migrations from other WHMCS installations or third-party billing systems. It's included with all self-hosted WHMCS licenses and WHMCS Cloud Growth/Expansion plans.
Advantages:
- Automated data mapping and import process
- Built-in validation and error checking
- Support for multiple source systems
- Incremental import capabilities
Limitations:
- Doesn't handle custom database tables
- May not transfer all third-party module data
- Requires both source and destination to be accessible
Server Sync Accounts Feature
For hosting providers using cPanel, Plesk, or DirectAdmin, the Sync Accounts feature can automatically import hosting accounts from your control panel.
This is particularly useful for initial setup or reconciling discrepancies between WHMCS and your control panel after migration. Access this feature at Configuration > System Settings > Servers.
Comparison: WHMCS Migration Methods
| Migration Method | Technical Skill Required | Time Investment | Downtime | Best For |
|---|---|---|---|---|
| Manual Migration (This Guide) | Intermediate to Advanced | 4-8 hours | 0-30 minutes | Most situations, full control needed |
| ImportAssist Module | Basic | 2-4 hours | Varies | Simple migrations, supported systems |
| Professional Services | None (they do it) | Hands-off | Negotiable | Complex environments, large databases |
| Sync Accounts | Basic | 1-2 hours | None | Control panel account imports only |
Pros and Cons of WHMCS Server Migration
✅ What We Loved
- Performance Improvements: Moving to better infrastructure typically results in 20-50% faster page loads and improved customer experience
- Enhanced Reliability: Modern servers offer better uptime, redundancy, and disaster recovery capabilities
- Security Upgrades: Migration provides an opportunity to implement the latest security practices and hardening techniques
- Cost Optimization: Consolidating or moving to more efficient hosting can significantly reduce operational costs
- Scalability: Newer server infrastructure provides room for business growth without future migrations
- Fresh Start: Clean installation eliminates accumulated technical debt and outdated configurations
⚠️ Areas for Improvement
- Time-Intensive Process: Proper migration requires significant planning, execution time, and testing (4-8 hours minimum)
- Risk of Data Loss: Without proper backups and validation, migration carries inherent data corruption risks
- Technical Complexity: Requires intermediate to advanced Linux and MySQL administration skills
- Potential Downtime: Even with best practices, some customer-facing downtime may be unavoidable
- DNS Propagation Delays: Global DNS propagation can take up to 48 hours, though usually much faster
- License Management: Reissuing licenses and updating configurations adds administrative overhead
- Troubleshooting Challenges: Migration-related issues can be difficult to diagnose and resolve quickly
Real-World Migration Success Story
— Michael Rodriguez, Operations Director at HostVenture Solutions
Final Recommendations and Best Practices
After personally managing over 50 WHMCS migrations, here are my most important recommendations for ensuring success:
1. Never Rush a Migration
The single biggest mistake I see is rushing through the migration process. Take time to prepare properly, test thoroughly, and validate everything. A migration delayed by a day is infinitely better than a migration that corrupts customer data.
2. Maintain Multiple Backups
Keep the old server online and functional for at least 7-14 days after migration. This provides a safety net if critical issues emerge post-migration. I once discovered a payment gateway configuration issue 5 days after migration that required reverting to the old server temporarily.
3. Test Payment Processing Extensively
Payment processing is the most critical function of WHMCS. Test all payment gateways with real test transactions before declaring migration complete. Even small configuration errors can prevent customer payments and damage your business.
4. Document Everything
Create detailed documentation of your migration process, including all configuration changes, credential updates, and custom settings. This documentation is invaluable for troubleshooting issues and planning future migrations.
5. Consider Staging Environment Testing
For production WHMCS installations, always test your migration process in a staging environment first. This identifies issues before they affect customers. Learn more about setting up proper WHMCS staging environments.
6. Plan for the Unexpected
Even with perfect preparation, unexpected issues occur during migrations. Schedule your migration with buffer time and have a rollback plan ready. Know exactly how to revert to your old server if critical problems emerge.
Related Resources and Further Reading
To maximize your WHMCS installation's potential after migration, explore these comprehensive guides:
- Complete WHMCS Setup Guide – Initial configuration and optimization
- WHMCS Security Hardening Guide – Protect your installation from threats
- Best Reseller Hosting Providers 2026 – Choose the right infrastructure
- Fix WHMCS Cron PHP Version Mismatches – Resolve automation issues
- Complete WHMCS Review – Features, pricing, and capabilities
- How to Start a Hosting Business – Build your hosting company
- Best WHMCS Alternatives – Compare billing platforms
Final Verdict: Is Server Migration Right for You?
Migrate If:
- Your current server performance is limiting business growth
- You need better reliability, security, or compliance features
- You're consolidating infrastructure or optimizing costs
- You have time to properly prepare and test the migration
- You're comfortable with intermediate Linux administration
Don't Migrate If:
- Simple optimization could solve your current issues
- You can't afford any potential downtime or service disruption
- You lack technical skills and can't hire professional help
- Your current setup meets all business needs adequately
- You haven't properly backed up and tested restoration procedures
Conclusion: Your Path to Successful WHMCS Migration
Migrating WHMCS to a new server doesn't have to be the terrifying experience many hosting business owners fear. With proper preparation, a methodical approach, and comprehensive testing, you can successfully migrate your installation with minimal downtime and zero data loss.
The key to migration success is preparation over speed. Take time to understand your current environment, back up everything multiple times, test your process in staging, and validate every step before proceeding. The few extra hours invested in preparation can save you days of troubleshooting and potential business disruption.
Remember that your WHMCS installation is the backbone of your hosting business. It manages customer relationships, automates billing, and processes payments. Treating migration with the seriousness and attention it deserves protects your business and your customers.
Whether you're moving to more powerful infrastructure, switching hosting providers, or optimizing your hosting stack, following this comprehensive guide gives you the knowledge and tools to execute a successful migration. And if you encounter challenges beyond your technical comfort level, don't hesitate to seek professional assistance—it's a wise investment in your business's continuity.
✅ You're Ready to Migrate!
If you've read this entire guide and created your migration plan, you're well-prepared for a successful WHMCS server migration. Trust the process, follow the checklist, test thoroughly, and don't rush. Your careful preparation will pay off in a smooth, successful migration.
📚 Need More Help?
If you have questions about your specific migration scenario or need personalized guidance, feel free to reach out. I'm always happy to help hosting businesses navigate complex technical challenges. Visit HostBillingPro for more WHMCS tutorials, guides, and expert advice.